Showing posts with label Bowie's Nursery. Show all posts

Friday, September 9, 2011

Tatum Evan Four Months


Each month we will be taking a picture of Tatum Evan in his nursery, as inspired by Making It Lovely.

Monday, August 15, 2011

Tour of the Nursery

I have been promising pictures of "The Nursery," aka Bowie and Tatum's room, formerly known as Bowie's Room, for months. I finally got a spare moment to snap some pictures... granted the pictures are taken with my phone, so they are not high quality shots. But I think some pictures are better than no pictures, right?

So without further ado... a little tour.

Some day, when Tatum actually decides he is ready to sleep in his own room and not snuggle in bed next to Mommy, I will be reading bed time stories and maybe doing some midnight nursing in this rocker. We had this custom-made at USA Baby when I was pregnant with Bowie and it finally has made it's way into a proper room. The stars rug was also snatched up from Pottery Barn Kids about the same time.


Wow, this shot is a bit blurry. And a bit busy. The room won't be quite so crowded when Tatum is ready to move up to a big boy bed as we plan on doing a twin trundle for the boys. This will free up enough space for a vintage play table we picked up at Habitat ReStore.


The shelves are not perfectly styled, and I doubt they ever will be. All the boys enjoy placing things on the shelves and the arrangement changes every day. But this is not a magazine room, this is a real room for real little boys... so a jumble of toys it will remain!


Tatum's crib is a fixed-side Jenny Lind. It came only in white, so Steven painted it flat black to match Bowie's twin cast iron bed. We purchased the crib from Babies R Us with a 20% off coupon. The crib was a splurge -- a pricey gorgeous giraffe set from Rikshaw Designs.


And right beside the crib is big brother Bowie's bed. Bowie's vintage cast iron bed was a $20 Craigslist score that we straightened up a bit with a rubber mallet.


Over Bowie's bed is a framed screenprint on a Guster concert poster by Furturtle.


The boy's share a vintage dresser we picked up at the Good Ju Ju flea market. It was originally painted a girly pale purple with shabby chic sandpaper distressing. I made it a bit more masculine with flat black and replaced the mismatched brass knobs with milk glass ones from Hobby Lobby.


This is the closet we saved. (The other become the bookshelves on the other side.)


Bowie's duvet is from Land of Nod. The orange sheets were ordered from Amazon. The white dust ruffle is from Target.


This vintage nightstand was $3 at Goodwill. It was a badly damaged Sears Harmony House piece that I primed and painted flat black. The "V" handle was original and received a shot of silver spray paint. Bowie inherited my old iPod. The lamp is from Ikea.

The barn star was purchased from Craigslist and painted flat black. The gyro-ceiling fan is by Minka Aire. It actually rotates around and the lights dim, all by remote control. Steven had to do some fancy wiring work in the room to hide the very modern control unit for the fan.

The lights on this ceiling shelf are a great nightlight. Another assortment of vintage Tonka toys on the shelf.


The curtains and sheers are from Target. Hardware from Bed Bath & Beyond and moon and stars finials from Pottery Barn Kids.


The door knob for the closet is vintage. We salvaged it from am old farmhouse that was being demolished.

I fell in love with this giraffe mobile from Pottery Barn Kids. Plain white and understated... Unfortunately, it had been discontinued. I found it on Craigslist for less than retail.

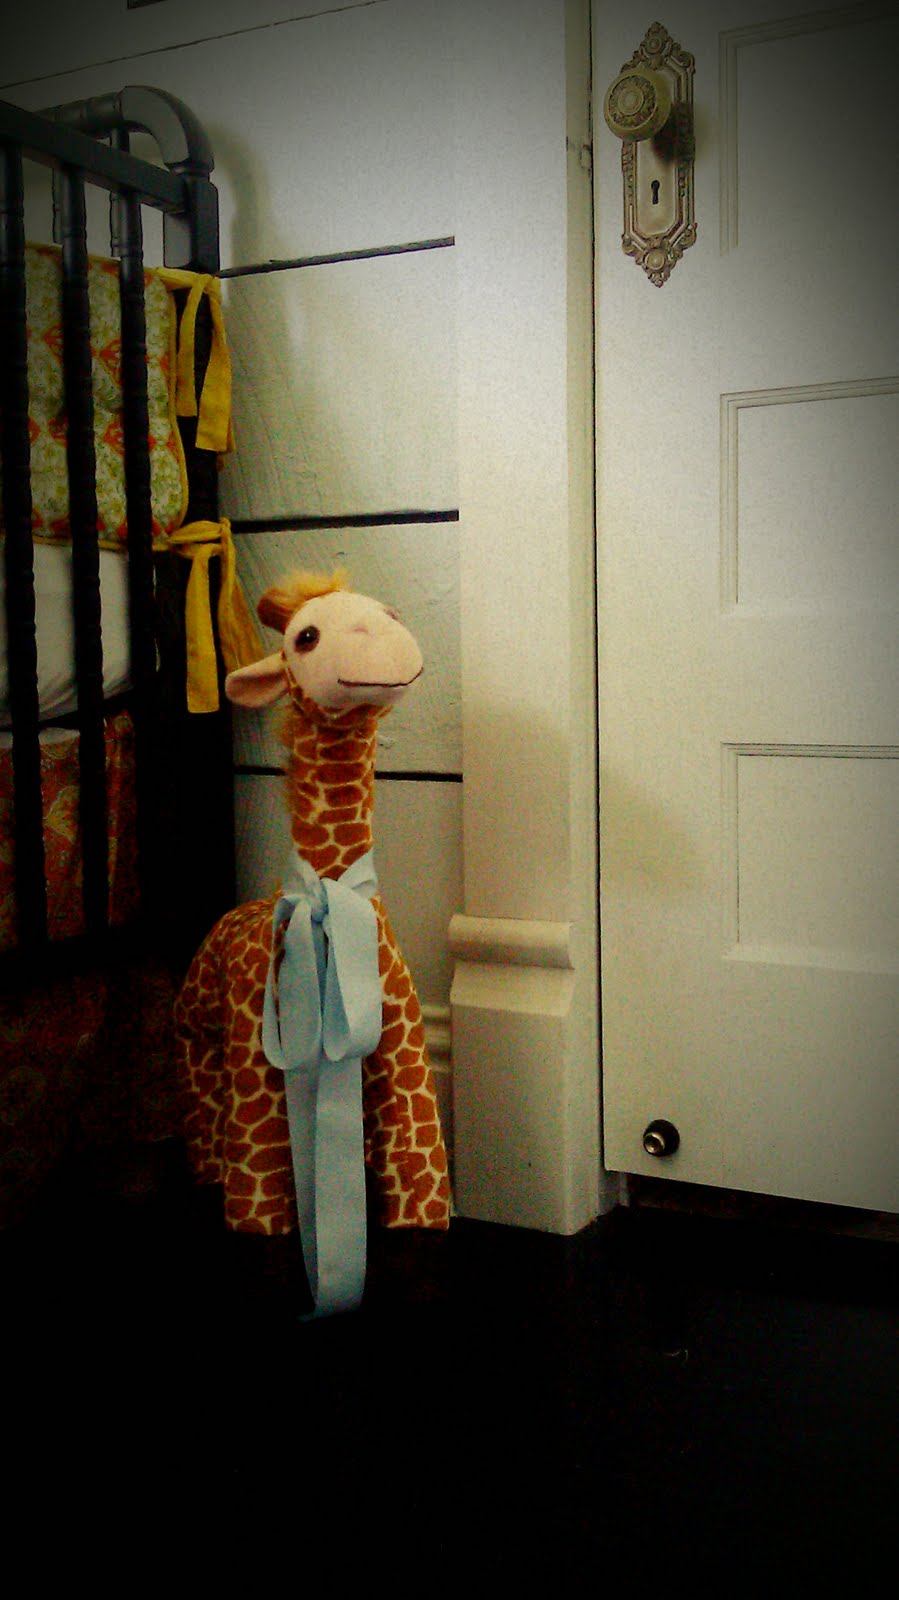
A giraffe for Tatum. Since Bowie has a favorite elephant, "Buddy," since he was a tiny baby, we decided Tatum should have giraffes. See that lovely cap at the bottom of the door frame, by the base trim? The original plinth blocks were lost during the construction of the room, so Steven made all the replacements. The little metal piece on the door is the other side of a magnetic doorstop that keeps the door from swinging in to the bookcases.
Two little beds, side by side.


Bowie's guitar leaned up against the rocker. He is a rock star, after all.

This lamp was from Pottery Barn Kids, but the shade is from Target. I really fell in love with an orange round side table from Crate & Barrel, but it just wasn't tall enough. So I found this metal table at Home Goods and Steven sprayed it Popsicle orange.

Bowie's favorite toy truck, a "Buddy L." We bought it since he named his elephant "Buddy" when he was a baby.


This ceiling is a masterpiece! Everyone thought I was crazy when I said I wanted corrugated metal and wood beams. Now, I think it is perfect!


A close-up of the giraffe bedding.


I spent hours staining these floors. I wanted them to look a bit worn, even though they had just been refinished. I chose Minwax ebony stain and matte polyurethane sealer.


A happy star.

This is the Good Luck Elephant that sits high on the shelves. He takes care of the boys and makes sure that Bowie has good dreams. (Bowie was not sure about sleeping in his room the first few times).


Push button switches and a hammered finish plate from Classic Accents.

Two of Bowie's friends, an elephant and a crocodile, keep him company.


Hope you enjoyed the tour! Maybe we can get some higher-quality pictures up soon. :)

Monday, August 1, 2011

introducing, Tatum Evan

We had a bit of a hiatus at the Cottage of Stone. And I am placing full blame on this little guy:

Tatum Evan made his appearance April 26th at 11:27 p.m.
He weighed in at 8 pounds, 2.5 ounces and was 21 inches long.

Ala, Making it Lovely, we have been taking a monthly picture of Tatum. Rather than use the white Eames-style rocker in the master bedroom, we decided to tote one of the black chairs up from the living room into the nursery.

I have a little to learn about getting the pictures to look exactly the same (maybe the time of day I take them or the fact they are taken with the camera in my phone?), but it is a cute project and we have really enjoyed it.

Speaking of the nursery, we did finish it in time for Tatum's arrival... not that we needed to, really. Tatum has decided he wants to sleep in our bedroom. But not in his gorgeous cradle. Nope. He needs to sleep in my bed, right next to me. (Clingy baby!)

We will get the (not-yet-used) nursery pictures up soon. ;)

Thursday, January 27, 2011

the painted nursery!

Bowie and Tatum's room (The Nursery) is very close to being finished. We have to install and paint some quarter-round along the baseboard, install the ceiling fan, and do some small touch-ups... but really, it is close. So close, in fact, that Bowie has started sleeping in his room.

The weather has been too cold to spray paint his new (antique) cast iron bed, so Bowie is settling for a mattress on the floor and his new big boy bedding.

One thing I would like to point out about the above picture is how beautiful the walnut still is even though we painted it. Really, it would have been an extremely expensive venture to have the planks re-planed, and tongue and grooved. So we did, in my opinion, a remarkable job of giving new life to wood salvaged from the hayloft of a barn that was being torn down and burned.

Anyway... look at the saw marks. Every board looks like that... just like when you run a comb over sand. Someday, the boys can run their fingers over those saw marks and maybe imagine all the animals that lived in that barn.

I think the bed stayed neat and tidy for about a minute. Just long enough for the boys to run into the room and decide to try out the bed. Here are the monkeys jumping on the bed! Dane (5) and Bowie (3).


For now, I am digging through all the toys and books we bought for the room and throwing them up on the shelves. The giant giraffe is not staying there -- but I do think he looks pretty cute peeking out of the cubby like that! I really love the way the floor turned out. Staining it ebony was the way to go -- it just looks great against the pale blue walls.

Here is a peek at the ceiling. People thought I was crazy when I said I wanted corrugated metal on the ceiling and faux beams. But I think the creamy white paint on the metal and pure white on the beams makes it look cozy and friendly (and not rustic!).

I also had to do some explaining when I said I wanted to keep part of the old ceiling framing to make a shelf. I wanted to do a nightlight feature up there, and it turns out to be one of Bowie's favorite things in the room! Flipping the switch... err... pressing the push-button switch lights up the shelf and casts a soft, dreamy glow across the ceiling. This was taken in the afternoon since at night, I just cannot get a decent picture of the light!


Next up... wire in the overly complicated ceiling fan, install / paint quarter-round, strip the salvaged door knobs and install, find the trim for the bottom of the doors that has been misplaced / paint / install, and begin painting furniture black.

Thursday, December 30, 2010

Bowie's Room hits Prime Time!

Priming is complete in Bowie's room! Of course, nothing ever goes as smoothly as you hope. First, we found that our fancy-shmancy power sprayer that we used once and packed away 3 years ago was not working. Steven made an emergency run to Home Depot and picked up a new one. After splatters and drips, he found that the extension wand he bought was not working. Finally, he was able to spray everything down with Kilz.

It actually took multiple coats of primer to get good coverage in the room. The walls are walnut planks that Steven salvaged from the hay loft of a barn being torn down. The gorgeous blade cuts made us swoon -- but the yellow cast seeping through the primer was just nasty looking. A few coats later, we have a nice white slate to apply our room color to. Since we haven't used the new Martha Stewart paint at Home Depot yet, we were not sure how forgiving the paint was... and we would be very upset if the yellow came through our top coat. Better safe than sorry.

Here you see 2 gallons of Salt Glaze, 1 gallon of Glass of Milk, and 1 gallon of Pure White mixed into flat enamel. (Home Depot was nice enough to mix the Martha Stewart color into Behr paint since MS doesn't have a flat enamel). The bottles are sprayer cleaner and some type of paint additive for the sprayer.


After days of sanding, caulking, cleaning and wood filling, we were ready for the big show! Bowie inspected Daddy's work before priming began. I must draw your attention to the windows... See all the paint on the panes? We did NOT do that. The previous owners were apparently not big on scraping paint off windows. Such an easy to fix eye sore -- why did they leave them like that?


Here is ceiling and big shelf that runs over the window all nice and primed. It is still drying here, but I cannot wait to see color go up!


Bowie checks out the bookcases. Steven took the shelves out to paint.


Here is the closet side of the room, to the right of the windows.


And the bookcase side, to the left of the windows.


Up next, a bit of sanding to catch the runs the sprayer left, and then spraying the ceiling our pretty pale cream color (Glass of Milk).

Bowie's Nursery... with a twist!

Bowie's room is in the home stretch. Hey, it was only 4 years in the making, right? Steven is applying the final coat of primer as I type. But life likes to throw us a curve ball every now and then, right?

All along, my vision for Bowie's room was pale blue, with cream and brown accents. We bought a black lifetime crib ("Emma" by Munire from USA Baby) that converted into a full-size bed. I snatched up a vintage dresser and nightstand to paint black. We had a glider rocker custom upholstered in brown with pale blue piping. Slowly, Bowie's room has been taking shape...

Those who follow my tweets on Twitter know we recently found out we are expecting a new baby. We hoped and prayed for a baby girl. In my excitement (denial), I bought all things pink. Liberty of London dresses, little pink crochet hats with giant floppy gerber daisies, pink wellies... It was a sickness, really.

My vision for the Baby Girl room was really coming together. We bought a non-dropside Jenny Lind crib with a Babies R Us coupon. We ordered the most gorgeous orange and yellow giraffe bedding from Rikshaw Design. I was painting test swatches of pink paint on the walls.

Baby Girl's Room was shaping up to look like this:


Alas, we went to our big ultrasound appointment. I informed the tech that if this was the wrong kind of baby, Steven was in big trouble. (He may or may not have been wearing a cup.) A quick pass over my tummy and, bam! Before the tech could even declare, "It's a boy!" we saw it ourselves plan as day. Let's just say this kid was not a bit shy that day.

Don't worry about Steven. I didn't kick him in the junk as I originally threatened. I admit, he did stub his toe that night and I told him it was karma. He got off lucky, folks.

I decided that with all the rooms in progress upstairs, it made the most sense to have Baby Boy #5 shake up with Bowie. Emery keeps his loft room. Dane and Satchel share the other large room. This meant the orange crib bedding was now wildly clashing with the blue and brown scheme. Hmm... Back to the drawing board.

Now I am seeing this:

Instead of the full-size bed, Bowie will get a twin. The room is really not big enough for two twin beds in the future. When the baby outgrows his crib, we will either do a trundle or a bunk bed.
Instead of the blue and brown star bedding, I ordered Bowie some blue and orange robot bedding from Land of Nod. He loves robots, so it really is a bonus for him.
The paint colors are staying the same. Pale blue (salt glaze) on the walls, pale cream (glass of milk) on the ceiling, and pure white on the trim.
We still have the brown glider rocker to deal with... I am really not sure where that is going to land since it will clash with the room... (taking suggestions on that one!)
Poor Steven has quite a honey-do list going, since I cannot help with the painting:
  • prime entire room with power sprayer
  • paint ceiling "Glass of Milk"
  • paint walls "Salt Glaze"
  • paint trim and bookcases "Pure White"
  • do any touch-ups
  • pull up drop cloth and pray nothing got through to the floor
  • install switch plates
  • install ceiling fan
  • paint furniture "Francesca"
  • hang artwork
  • bring up all cool stuff we bought and have stored in basement
In progress pictures coming soon...

Friday, October 1, 2010

oh, we've been busy....

Although I have not had a chance to do much in the way of blog (*cough*sorryaboutthat*cough*)... we have been busy at the Stone Cottage as usual.

We finished painting, staining and shellacking the shelves for the records. And started the tedious process of alphabetizing our collection... still not done...


Speaking for staining and shellacking. To get the stain color right, we had to take a piece of the old trim in to Sherwin Williams and had a color custom mixed. To get the yellow aged look of the shellac, we used Amber Shellac. And it is a super close match to the existing woodwork. Woot! Note: 3 year old Bowie loves Halloween and decorated the mantle all by himself. Future Design Star? Maybe not.


I wasn't digging the Ikea sconces we had put up. They looked too small for the giant fireplace. So I searched and searched for something that blended the line between modern and historic... and found these... I really think they look like a modern Edison-style fixture. And are a more suited to the scale of the fireplace, I think.


I did two coats of ebony stain on Bowie's floor, and a couple coats of clear matte polyurethane. Steven has the floor covered up and we are ready to spray the room down with primer! (Almost done!!!)


In the boys' bathroom, Steven finished the wiring. When I say wiring, I mean he had to install new outlets and fixture boxes, then run electrical from the second floor all the way down to the new breaker box in the basement. Sound like fun? Yeah... ask Steven how much he likes wiring right now!

I picked these plain (cheap) and I think, rather vintage looking, sconces from Home Depot for above the vintage medicine cabinet. Also, you can get a hint of the pale green paint in the bathroom. Think Vintage Spa!


And as if we did not have enough projects all ready... we started in on Emery's loft. See, Emery's room is much smaller than the other two bedrooms upstairs. We decided to give him some more space by tearing out the ceiling and creating a loft in the attic space.
First we had to deal with a strange boxed in area to the right of his windows. This boxed in corner was covering up the portion of the stairway that extends into his room. We decided to create bookcases and cabinet on either side of the window to conceal it. On the right side, the cabinets are not functional (since the stairway is behind it). On the left side, the doors swing open for use as a desk. Between the bookcases, there is a storage bench that I plan to upholster a comfy pillow for.


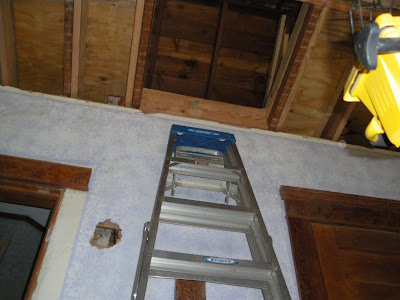
Looking up, you will see we tore out the ceiling. We extended the floor of the attic out a bit to create a "lip" for the loft... this is to give a bit more space and create an area for the ladder to go. (We are planning to use a built-in industrial ladder for loft access).
In the loft, to the right is an area that we plan to put a nightstand and a few small furnishings in. In order to tie in with the plaster walls below, I chose to use regular old house siding. After Steven redid the insulation, of course. It would be impossible to get drywall to look like ancient plaster... and this draws the eye up, I think. There will be trim separating the two where they meet.
This is the left side of the loft. Emery's bed will go on this side. The hole in the wall is where we are putting in access to the attic. (Someday we might need to get to all that electrical!) The boxed in part on the left is the chimney. I would have liked to put the sconce there, but there just was not enough room. It will be going over the attic access.
Here is the view from the loft... We scored antique balcony railing to use for the loft... can't have kiddos trying to parachute their way down or something. (Heaven knows they would try... boys!)


So, there is a little tour of our chaos. Once we get some projects buttoned up, I will be able to post some before and afters... until then, it is time to get messy with some paint!