Showing posts with label master bathroom. Show all posts

Wednesday, August 12, 2009

styling... are you a frou-frou arranger,or a slap-it-up utilitarian?


I was thrilled with how Phase One of the master bathroom came out. Every time we have company over, we gets compliments on the floor. It is such an unexpected and gorgeous surprise to have that bright, cheery floor greet you. Remember the before? Click here

But I always thought back to the little glass shelf I saw at Lowe's when I was buying the dental organizer sitting here on the shelf. I thought it would look great over the sink, and just tie everything in a bit more:

I finally bought a little glass shelf and Steven installed it for me. Since the planets didn't align and the studs were not in the right place, we had to use the 4 supplied wall anchors, which always makes Steven nervous. I told him this was different than when he put up the guitar anchors because I swore I would put nothing heavy on the shelf. It looks so nice:

I am not really a frou-frou kinda girl. I tend to just put things on shelves in a rather utilitarian manner. Shelf by a sink? Put some soap on it! I was in a hurry, since it was late night by the time Steven got around to installing the shelf, so I just put my little soap holder and tea lights on it:
It looks rather sad and sparse, doesn't it? But, again, I am not a frou-frou girl. I have read the design blogs where they talk about spending hours styling a bookcase until it is just so. Me? I have 4 kids constantly pestering me and a stupid Statistics final this week. I took the easy way out and dug out my apothecary jars. Still utilitarian in that it makes sense to have cotton balls and swabs nearby... but prettier than the soap dish alone:

What is in the middle jar, you ask? Well... It is sort of weird. My kids have always enjoyed blowing soap bubbles in the bath tub. The middle jar is filled with those little decorative bubbles that they give out at weddings. It keeps the bubbles for the little ones handy, and the little containers are kind of cute.
So tell me... Do you fuss over styling and arranging until it looks like a perfectly-posh Pottery Barn catalog? Or do you take the utilitarian approach? Or are you somewhere in between?
Oh, I should mention that in order to see if something looks good, I always take a picture. I "see" things better in 2D for some reason. In a picture, I can point out if a garden bed needs taller plants, if a picture should be hung lower, etc. Those things are not as obvious to me in real life.

Friday, February 27, 2009

Bathroom, Phase 1 is done! Yippee!!

I finished the final details (sewing a curtain to cover up the ugly cubby, putting up the mirrors, etc) and am so excited to share the pictures with you. Bowie's 2nd birthday party is on Sunday, so we are killing ourselves trying to get everything ready. (Today's big project is re-doing the kitchen floor. FUN!) See the grossness that was the "before": http://cottageofstone.blogspot.com/2009/01/our-bathroom-went-from-blah-to-war-zone.html

Anyway... here are some pictures. I hope you think it's pretty! And I cannot wait to get started on the clawfoot tub refinishing for Phase 2!

I had to stand on a stool to get this shot of the floor. Up close, you can still see the wood grain and tell it is hardwood, but from a distance, I suppose it just looks like a shiny floor.

Here you can see how the shower curtain and cubby curtain look together.


I was so pleased with the White Ruffles shower curtain. Filmy and sheer. I added a solid white liner.

And here is the cubby curtain. It is a Simply Shabby curtain panel that I hemmed up and hung on a tension rod.

OK... we are weirdos. I decided to skip the traditional mirror when I found these cool circle mirrors. It meets my"Cottage with a Kick!"

Another shot of the mirrors.
Here is the dental organizer. I love it!
I found this little basket for $3. I keep my "daily routine" items in here, facial cream, sunscreen, etc.

This little ceramic basket I found at Goodwill for $2. The candleholder was $1, I just sprayed it ballet pink.

These little tealight holders were $1 apiece. The hanging one was $7.

I just love the faucets. The spout swivels, but I don't know that I ever have a need for it to.

I loved this little clawfoot tub so much, I bought 2 when they were on clearance. I have one sitting on the tub as well.

Tuesday, February 24, 2009

T-Minus 5 Days and Counting...

Sunday is the dropdead day for a few of our projects. You see, we originally planned on having Bowie's nursery done in time for his 2nd birthday party. Yeah... that didn't happen. His birthday party is being held on Sunday (a couple days early) and his room doesn't have a ceiling or walls. But I am sure Bowie doesn't mind, really... at least that is what we tell ourselves.

What will be done, by driving myself like no tomorrow, is the kitchen and phase one of the master bathroom.

Yesterday, Steven and I installed the beadboard backsplashes (he cut, I glued & nailed). I put a first coat of paint on last night, and did a few touch-ups this morning. Tonight, we will put in the little shoe piece around the bottom edge.

Now... I do have a wild hair to paint the laminte counters flat black. I don't like the way the blue-gray counters make my gray cabinets look a bit green. But, this is a big project in terms of prep as it will require a lot of masking off, since I'd have to use Fusion spray paint. But really, this is the type of project that should be done before the shoe is installed.

Hmmm... should I go for it? hmmmm...

After that, the kitchen just needs a good cleaning. And then I will repaint the floor. It is currently a dark brown (Cottage Brown), but I want to do it in charcoal. I'd love to do a high glass charcoal or black, but gloss is not very forgiving and the floor in the kitchen is jsut subfloor. I will think on that a bit.

As for the bathroom, it's installing quarter round. (The walls are a bit wavy and made installation of the baseboard so fun). Caulking. Paint touch-ups. Tear cheap shelves out of cubby and replace with drawers I bought at BB&B. Sew curtain to cover up cubby opening. Install shower curtain (where are you, UPS?) Do another coat of floor paint and varathane - the final coat to cover up scuffs and dings from plumbing installation.

It doesn't seem like much, but we also have to get the house tidied up for the party. And I have to bake cakes and snacks....

And still, I am raring to go on the dining room. I guess pink paint is a big motivator for me. ;)

Pictures soon!!!

Thursday, February 19, 2009

Vintagey white ruffled shower curtain bargain-hunting...

OK, so I could totally make my own knock-off shower curtain... But with Bowie's 2nd birthday rapidly approaching, I have too many home projects to wrap up. I can't spare the time to sew something I could actually buy pretty cheaply. yet, I just can't see myself spending big bucks on something that could possibly get grimy...

I was on the hunt for a white shower curtain, with a slightly feminine, vintage feel. Here is what I came up with!


I am ordering the "Ruffles Shower Curtain" from Target. It is only available online, but at $30 - it is a steal compared to the ones I am about to show you. I love the few little ruffles thrown in. It reminds me of some old apron you would find at a flea market. Other websites list this as a Joseph Abboud Ruffles curtain... I guess it depends on where you shop.

The next one is the White Devil shower curtain by India Rose. (White Devil? Really??) This one is by India Rose. Anthropologie has one called Cloud & Spectrum that is exactly the same but with pastel edging on the ruffles. $100 for these curtains.


This one is by Ann Gish and has a very similar to the Target one, although arguably higher quality. You can get it at Horchow for $212, plus shipping.


Here is another India Rose curtain... this time pin-tucked. $96 for this one.


This one is called the Can Can by Main Street Bedding. It's $249.

Master Bathroom pictures... at last!!!

Look at that shiny painted oak floor!!

I am so happy to finally be able to show you a few pictures of the bathroom. Steven finished the pedestal sink install last night. The floor has a few scuffs on it from him rolling around on it in his black-soled shoes (lesson learned: remove shoes while rolling around on floor to do plumbing). But those will come right up with a Magic Eraser. And we have paint touch-ups to do. That is always the last step anyway - fixing up the boo-boos.

Anyway... I stopped by Target today, eager to get my shower curtain, but it turns out the one I want is only available online. So I will order that in a bit. The shabby chic curtain we have now is pretty, but this pure white one has just the vintage look I want. The Target "Ruffles" curtain is $30. Be sure to read my next Bargainista on similar shower curtains!!!
I did pick up a plain super soft white rug for $7, though. And I need to go to Lowe's to get that dental organizer I mentioned in my last port. I have no leads yet on the mirror I want. I am almost thinking of buying a mirror and taking it to a shop to have it cut custom.

Oh, exciting news... I scored an antique 5' claw foot bath tub on e-bay for $25! We will be picking it up this weekend. We can powder coat the feet ourselves and will have an auto painter spray it for us. What a bargain, huh? Pictures of that later!

OK... enough rambling... Here's the good stuff!

See what I mean about the black floor vent? There is that $7 rug. It is so soft, you just want to dig your toes in!

Here is where I need a mirror. I thought about a medicine cabinet, but it might look awkward unless we cut out the wall and mount it that way...

Here are the new faucets. I love the British cross handles. The spout is really tall - it sort of surprised us. These are brushed nickel. I don't dig on shiny.

Speaking of not digging on shiny... The light I wanted only came in chrome, so we sprayed it brushed nickel. We left the screws chrome for just a glimmer of contrast. I love how the shade mounts have the "cross" that echoes the faucets.


Remember when I mentioned I liked how the black floor vent popped against the blue floor? This is the same scroll vent as I put in the kitchen. I can't wait until we do the electrical in phase 2 and put in push-button switches with black switch plates!
Sources:
Wall Color: Wash Basin by Ralph Lauren (flat)
Trim Color: Ultra Pure White by Behr (gloss enamel)
Floor Color: Shallow Sea by Behr (gloss enamel)
Floor Sealer: Varathane Clear Gloss
Wall Fixture: Delta, sprayed Valspar Brushel Nickel
Ceiling Fixture: Hamilton Light/Fan
Toilet: Pegasus Cottage Classic Collection
Pedestal Sink: Pegasus Cottage Classic Collection
Sink Faucets: Pegasus Classic Collection, Brushed Nickel

Wednesday, February 18, 2009

we have plumbing!!!!

It is really the small things in life, really. Being able to brush my teeth in a sink and not by leaning over my bath tub. And not having to go all the way upstairs in my kids' slightly scary bathroom.

Steven installed the toilet yesterday and the pedestal sink tonight. They look great. He even got the baseboards painted and set into place. He will hopefully get them nailed up tomorrow. I can't believe how it all came together. I know in the floor painting post, the floors looked weird without the baseboard... but really, with the mushroom gray walls, robin's egg blue floor, and white baseboards, it just came together. And I love that we put in a black floor vent. It is the little things like that, the tiny details, that I love.

I will try to pick up a new shower curtain (plain, white and ruffled) and a fluffy new bathmat tomorrow. I still am trying to scope out a mirror that is small enough to go under the light fixture. I am hoping to find one in an interesting shape. Oh, and Lowe's had these really cool dental organizers. It looks like a thermos with a fliptop that you can put toothbrushes and paste in. So cool!

Anyway... I will try to scrub up the floors tomorrow and post up some new pics... for now I am super tired.

Have a great night!

Monday, February 16, 2009

DIY: how to paint hardwood floors in a bathroom

We are in the process of a bathroom transformation. Phase 1, to be exact... those following along with my bathroom project may share our excitement in that we are almost done! I am finished with the floor, and Steven is working on baseboads and installing plumbing fixtures!

Our floor was completely trashed out, and we had to start from scratch on a new one. Since we don't have the budget now for the totally pimp sea glass hex tile I wanted, I had to compromise. We decided on a hardwood floor since Lumber Liquidators has dirt cheap white oak lumber.

Hardwood in a bathroom? Am I crazy? Well, possibly. I do have 4 insane male children. But hardwoods CAN work in a bathroom... and I thought I would share with you my process for making my hardwood floor as watertight as a dolphin's butt. I shall dub thee "Bathroom with Robin's Egg Blue Floor."

1. Here you see our subfloor which was just installed over the 1 x 12 planks.

2. The subfloor was covered with 15 pound asphalt felt. This comes in a giant roll from the hardware store for under $30. Overlap the seams by 3 inches, and a few staples to tack it into place and you're golden. 3. Install the hardwood floor. We had such a small space to do, we decided to hand nail everything in rather than rent a floor nailer. Just remember to pre-drill the holes because hardwood floors are, indeed, hard. Steven broke so many bits on this little project. There are entire sites devoted to installing hardwood, so go there if you need excrutiating detail.

4. Use wood filler on your counter-sunk nail heads. Then sand!

5. Clean your floor 800 times more clean than a floor has ever been cleaned. If your wood has some type of coating on it, use Simple Green or a TSP substitute to get the grease off.

6. Primer. I like Kilz, but Zinsser or Bin are fine, too. I like water-based paints. Hey, oil-based are being discontinued anyway.... So a primer meant for latex is always good. They even make mildew resistant and all that. I did 2 coats of primer.

7. Paint. I used a high gloss enamel paint. Here's the deal... I used floor paint in my kitchen, and you could totally use that. I went for high gloss enamel since I knew I was going to be sealing it anyway. The floor paint can will say "no need to seal." Yeah, that's a load of bull. I didn't seal my kitchen floor and in 6 months it looked like crap. I did 3 coats of paint. Because I am obsessive and I don't want my floor to look trashed in 6 months ago.

8. Sand. A super fine grit with a palm sander worked just nifty.

9. Clean again like you've never cleaned before.

10. Seal. I used high gloss Varathane. I know some people use polyurethane on their floors. I wanted something super resilient and, dammit, this is a bathroom. Varathane is specifically made for floors and I wanted that super-deep gloss finish. The floor is the statement in my bathroom, so it has to be just right. I did 3 coats of varathane. You could do less, but the more coats you do, the "deeper" the paint looks. Sort of like the difference between a paint job on a Ford Focus and a Porsche 911. I don't want my floors to have the "krylon touch."

11. Do a happy dance on your new floor. And be terrified every time you have to give the dogs a bath and their nails go clackety-clack across your gorgeous floor.
Next we will have pictures with baseboard and plumbing... Stay tuned!

Thursday, February 12, 2009

painting and lighting... check!

A little teaser for you... the fixture was chrome, but I do not care for shiny metals, so Steven sprayed it in Brushed Nickel to match our faucets. So pretty! That is also the new wall and trim color.
Another grueling night of hard labor... but the bathroom is finally looking "pretty." Just the floor (which is big project), baseboard and toilet & sink. But those will go fast compared to the demo and plumbing. Really! I keep telling myself that.
So today, I got the walls and trim painted. (The trim that goes around the ceiling, windows, etc... still have not put in the baseboard). Mind you the trim around the ceiling isn't traditional "crown" per say. It is the unmitered 1x4 treatment that was popular during arts & crafts. I suppose it is crown, it just really isn't moulding. But I digress... The wall color is just gorgeous. I am so thrilled with the way it turned out. I used flat Ralph Lauren "Wash Basin" on the walls. I used Behr "Ultra Pure White" in flat enamel for the trim. I really wanted a pure white for the trim so that there would be a contrast with the light white walls. The walls are a sort of chalky gray white. More white than gray.
Steven installed the new fan/fixture, which of course was not easy. The existing cheapo fan could not be removed from the ceiling. I guess the people installed the fan and then the ceiling, because the fan box was bigger than the hole. We didn't want to cut a bigger hole since the existing hole was the right size for the new fan. Steven took a look above the ceiling and discovered that there is nearly 2 feet between the original plaster ceiling and the new drywall one. And, the old plaster and lath are falling down. Which means that when we do phase 2, we will probably need to rip out the ceiling and do some repairs. Lath falling down is not a good thing. But that ceiling is going to SOAR. It will be impossibly high, and I need to start dreaming up a plan for that new ceiling. Steven shoved the old fan off to the side in the ceiling and put the new one in. It is really nice. It looks like a regular old light fixture, but it is also a fan.
Next, he pulled out the old light fixture that was over the old sink. He found that they had installed it using a light switch box instead of a fixture box. DUMB!!!! So he got it installed for now... but phase 2, he will pull it down and install it using a fixture box. (Again, another "what were they thinking" moment.)
Next up, a little bit of touch up on the walls tomorrow and then Steven will start in on the hardwood floor installation. I can't wait!!
Here are some pictures of the progress. Not super exciting for you all, but thrilling for us!

Steven's handywork... Toilet on the left, new vent in the middle, and sink to the right. And all new 1x12s for the ground floor.
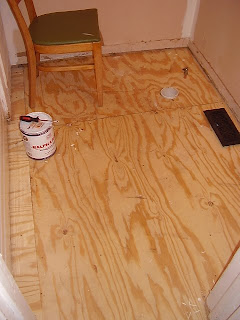
The new subfloor. We have something to walk on! Yay!!!


Here is a wall after I finished my drywall repairs... not too shabby! The old paint color was taupe. Which is OK, but soooo boring.

All new paint! The trim is still shiny wet. I can tell already it will be a pain to photograph the wall color for you guys. It is so gorgeous in person.

Monday, February 9, 2009

in the home stretch!!!

We are soooo close on the bathroom project. Although the list of to do's seems long, the plumbing was really the big hold-up. Steven had to move all the ancient plumbing around, which meant replacing most of it. He also had to install a stud to mount the pedestal sink to. After all that, he had to replace the rotten 1 x 12 sub floor planks (which included cutting out holes for all the plumbing lines), and put down a subfloor (which again needed the holes cut out). He also put in functional vents - so the bathroom won't be freezing. Finally, he removed all the old trim from around the door (which was actually chair rail).

I was tagged in last night to cut in all the paint. (The color looks fantastic!) And today I began patching the drywall. Everything is taped and I put up the first layer of mud. When I get home from visiting my tax lady, I will hopefully sand and put up the top coat. So, tomorrow (or the next day) after I finish painting the walls, Steven can put in the hardwood floor. Then I paint the floor with 4824972 layers of paint. Then Steven installs all the trim, then I paint trim. Last, Steven gets to install the pedestal sink and the toilet. Then I can accessorize - which is the FUN part!!

And it all began with me wanting Steven to pull up the vinyl so I could paint the floor. Yikes!

The kitchen got sort of sidetracked by the bathroom... but all it needs is the floor painted and the beadboard backsplashes installed and painted. I sprayed the table base and the chairs. I started with the fabric, but quickly realized my new electric stapler is woefully inadequate. I plan to try to exchange it for one that can actually, oh I dunno, STAPLE something. ;)

Then the dining room begins. I have already picked out the perfect shade of pink! I am super excited!!!!!

Wednesday, February 4, 2009

project board for the master bathroom


I might scan in the sketch I drew up earlier... but I thought I would share the project board with you now. I would love to hear everyone's thoughts and opinions! I always entertain suggestions. ;)

Apparently the gigantosize feature is not working... let me do some troubleshooting and see if I can get it working.

Monday, February 2, 2009

floor vents that actually work, and other niceties

I know you all want pictures of the kitchen and bathroom... Honestly, the bathroom monster project has derailed the kitchen project a bit. We were almost done with the kitchen, but then the bathroom project took over, and me having to trek upstairs to use the kids' toilet sort of shifted my priorities.

We are learning all about plumbing and HVAC now. The vent that will the bathroom was not hooked up to anything. Some dolt cut a hole in the floor and put a register cover there, but there was no ducting at all connected to it. Doh! So Steven ran ducting to a beautiful new register cover (that matches the ones in the kitchen) and it has made a real difference. Our bathroom is not frigidly cold anymore. Yippee!

The sink that was in the bathroom was tiny and on a short little wall. I wanted a nice new pedestal sink, so in order to accomodate the larger sink, Steven has to move the plumbing onto the same wall the toilet is against. He is coming up with nifty ways to conceal the valves (since they are not attractive and pedestals never seem to really conceal them) and the trap and all that.

The old toilet has been removed and will eventually go up into the boys' bathroom since theirs is older than this one. I will be swinging by Home Depot this week to pick up the new one. No big rush on that one since Steven has to do some updates. The old plumbing is lead and completely decroded. (Yes. Decroded. I may have made that up.) So he is putting in new fittings and such so that we won't have another leaky toilet.

We decided to leave the apron-front tub in place, as well as the cubby cabinet thing beside it, for a few months. Until we can afford a clawfoot and freestanding shower. So Steven will be installing hardwood until he hits the tub. Later on, when we remove the tub and cabinet, we will do the rest of the floor. (I can't wait!!)

The base trim we picked out is really pretty. Who knew one could get so excited about base time. But since the previous people used chair rail for base trim, I was eager to fix that.

Our bathroom was actually remodeled into the house in the late 40s, along with our bedroom. Therefore, I am pretty OK with bending the historic preservation rules on this room. I am allowing myself to not be restricted so much with my materials. And since we are going with "cottage with a kick" as our motto - I think an aqua-painted wood floor with white everything else would really pop.

Once Steven is home from work and starts tearing into the room again, I will put some more pictures up. Right now, our only big update is the floor vent... but no way would you be as excited about that as we are. ;)

Saturday, January 31, 2009

master bathroom is in full swing!

Exciting news at the Cottage of Stone... we made a trip to Home Depot and bought our first round of supplies for the war-zone master bathroom! Steven is finishing the demo right now as I type. What a trooper. But soon I will have progress pictures, and some step-by-step DIY information on:

installing and finishing a white oak floor from Lumber Liquidators (I know, I know... you think I am crazy for putting a hardwood floor in a bathroom. Really, I have a PLAN. Trust me! It will be painted a gorgeous spa color and sealed water tight like a dolphin's butt.)

installing victorian baseboard (mitering is easier than it looks!)

moving existing toilet set-up and installing a new toilet (we bought a flapperless Pegasus toilet called "Cottage Collection" - how perfect!)

moving existing water lines and installing a pedestal sink (we bought the matching Pegasus pedestal sink from the "Cottage Collection)

installing new sink faucets (again, a Pegasus product)

A later Phase II will include a installing a restored clawfoot tub and freestanding shower enclosure, but for now, we are keeping the apron-front tub. We elected to leave up the cheap shower panels and not do subway tile since it would all be riped out when we do the clawfoot anyway. Hopefully, the clawfoot will be in a month or two.

Stay tuned for pictures!

Thursday, January 29, 2009

our bathroom went from blah to war zone!

It started with a simple, “Oh, honey... I want to fix up the bathroom. Can you pull up the vinyl so that I can seal and paint the floor. Then I will just paint the walls and trim, make a curtain, and it'll be done.”

HA! What was I thinking? I have seen the previous owners' other handywork. Was I delusional or smoking crack?


Steven goes in, pry bar in hand, and pulls out the cheap trim someone lovingly installed with huge staples. Yes. Staples. Not finish nails, but staples. Then he starts pulling up the cheapo vinyl flooring. I made a run to the hardware store for a new wax ring for the toilet since he had to put that off to the side. He pulls up the vinyl, and GROSS! There is a nasty, moldy, water-damaged sheet of subfloor.

We decide it is good to have discovered the water damage and press on. Steven pulls out the moldy plywood and we discover quite possibly the ugliest vinyl under that. And the water damage around the toilet and apron-front tub is getting worse. The original lead toilet fitting is exposed and he pulls that out for replacement. (My cheap painting project is getting a bit more expensive.)

Steven goes to work prying up the next layer of vinyl and it is tougher work. (Some cursing about staples could be heard at this point.) After that was up, there was more rotten subfloor. (More staples!!) Under that subfloor was the original 1 x 2 hardwood floors (like in our bedroom) were so rotten they were black. Finally, under that, the 1 x 12 planks that the old-timers used for subfloor.

Steven gets the “Husband of the Year” award now. What was a simple job turned mega. And he never complains. :)So, on my list now... figure out a new floor (painted wood like I originally planned or somehow, some super cheap tile). If we have to remove the tub to repair the entire floor, which I think is what Steven wants, a new tub surround. The list grows. Our bathroom looks worse, but will soon be better. I hope.


P.S.
I have no toilet now. I will have to brave the boys' toilet upstairs until this is fixed. Scary!!!